


Materials needed:
- 8 oz (227 g) of Extra White PLUS Clay - Air Dry Clay
- Small amount of Black PLUS Clay - Air Dry Clay
- Activ-Tools™ Clay Tools Set
- water
- water dish
- sponge
- orange paint
- messy mat

Step 1: Body
Form a potato shape and two smaller egg shapes.

Score and slip all the pieces together.

Scoring is scratching the edges of clay before joining them together. Slip is liquid clay used to join pieces of clay together like glue. You can make slip by mixing water and clay together in a dish. Do this scoring technique on all the parts that you put together. This will help keep your pieces from falling apart later when they dry.
Step 2: Wings
Smooth the side pieces of clay onto the body.

Gently pinch the ends of all three pieces of clay to create the wings and tail.

Step 3: Neck
Roll out a thick coil of clay for the neck.

Attach the neck to the front of the body.
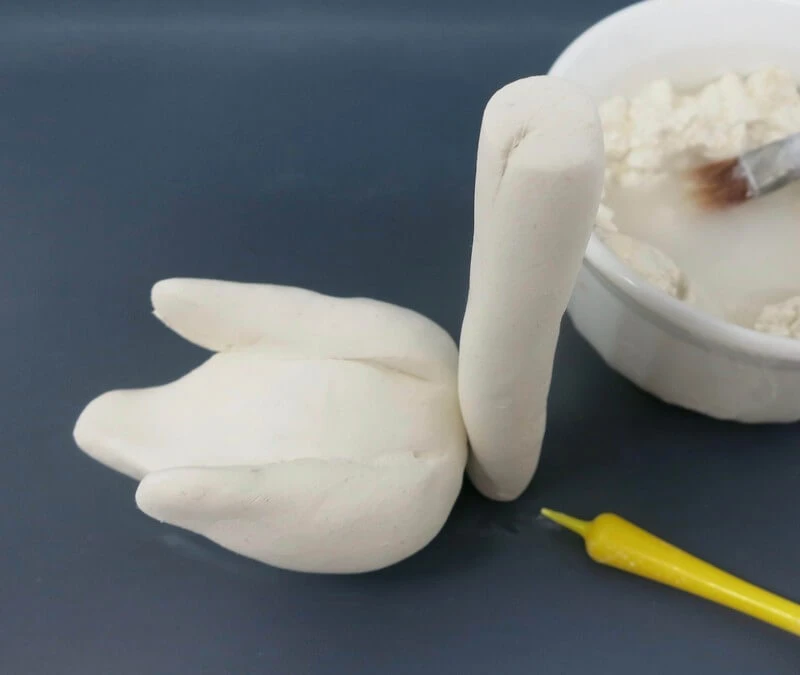
Smooth the coil onto the bottom of the body with your finger.

Bend the coil into an S shape.

Step 4 Head:
Roll out two tiny spheres of black clay for the eyes.

Attach them to the top of the S shape and poke a hole into the center with a pointed clay tool.

Roll out a small cone form for the beak. (Orange paint can be added into the white clay and kneaded together first or painted after the clay dries.)

Attach the beak to end of the S shape.

Step 5: Feathers
Gently press in a flat clay tool into the wings three times to create the feathers.

Step 6: Dry
Allow your sculpture to dry 24 hours. Once it’s dry it’s ready to be displayed.