

Materials Needed:
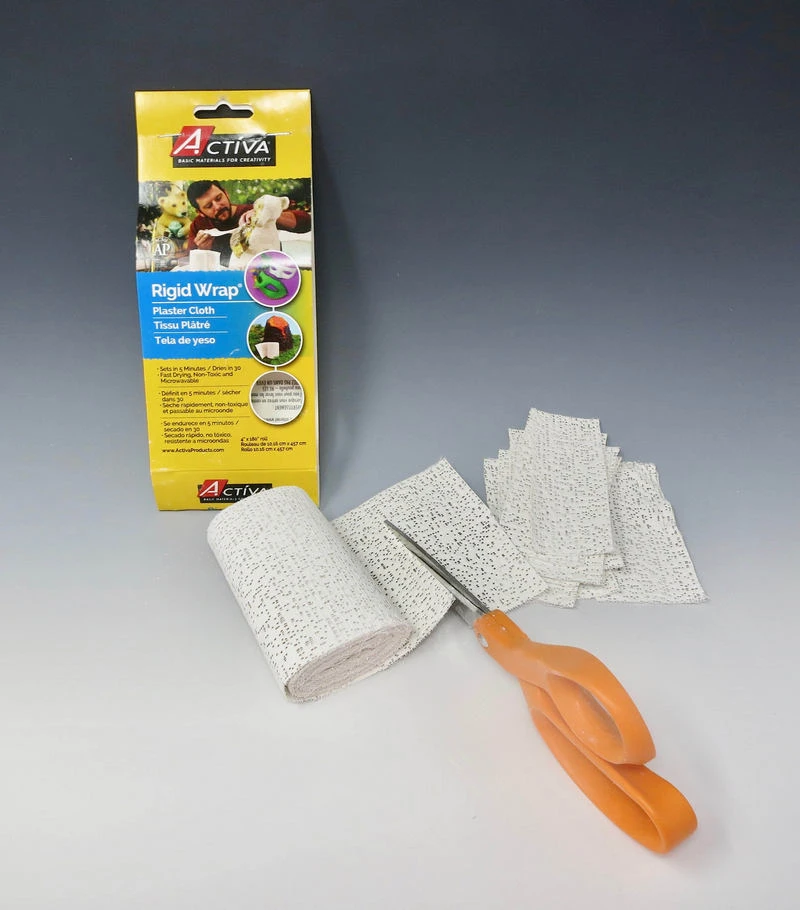
- Activa’ Rigid Wrap Plaster Cloth
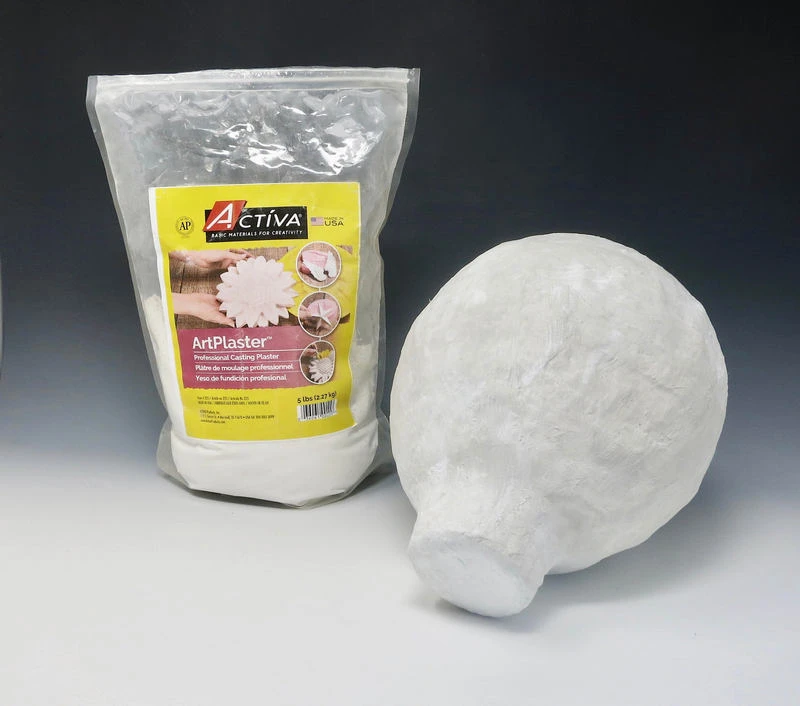
- ArtPlaster Professional Casting Plaster
- Balloon
- Small Plastic Cup
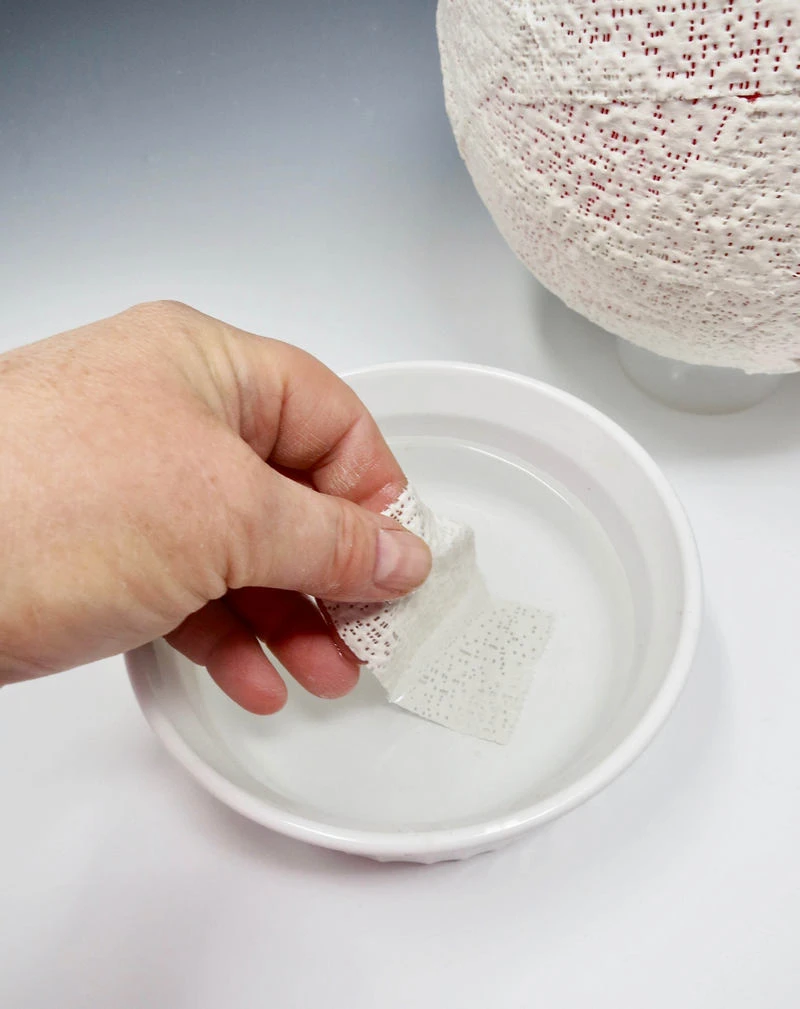
- Water Bowl
- Scissors
- Utility Knife
- Cardboard
- Pencil
- Masking Tape
- Cardboard
- Hot Glue Gun
- Liquid Glue
- Paint
- Paint Brush
- String
- Gloss Sealant
- Burlap
- C-Hook
Step 1:
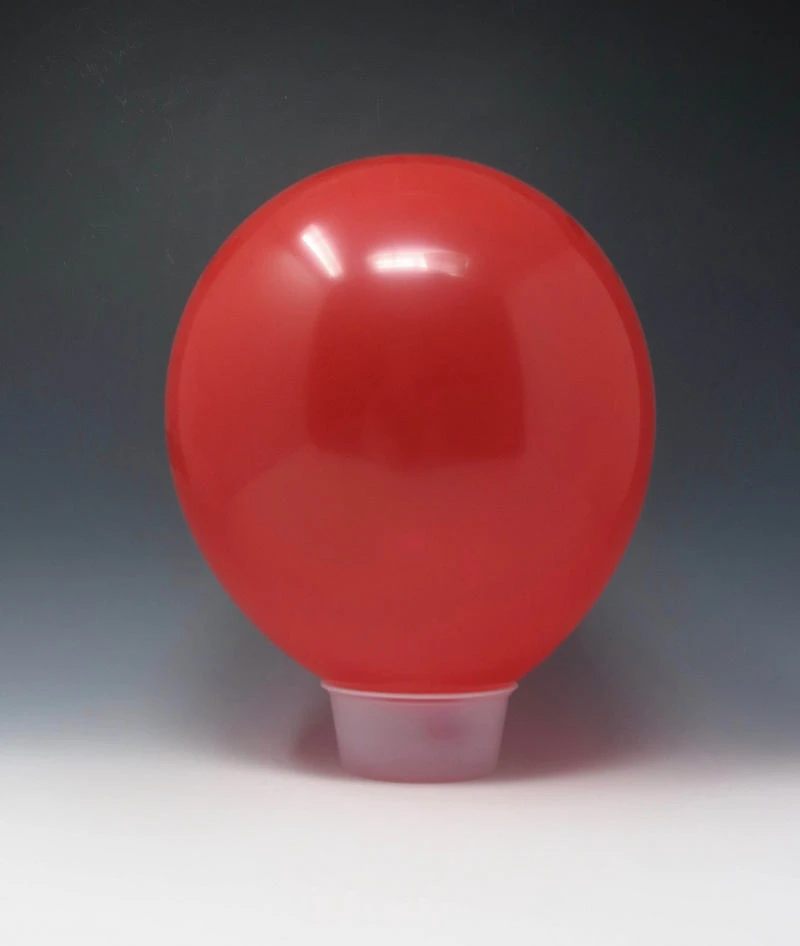
Armature
Inflate a balloon and balance it inside a small plastic cup on a table top.
Step 2:
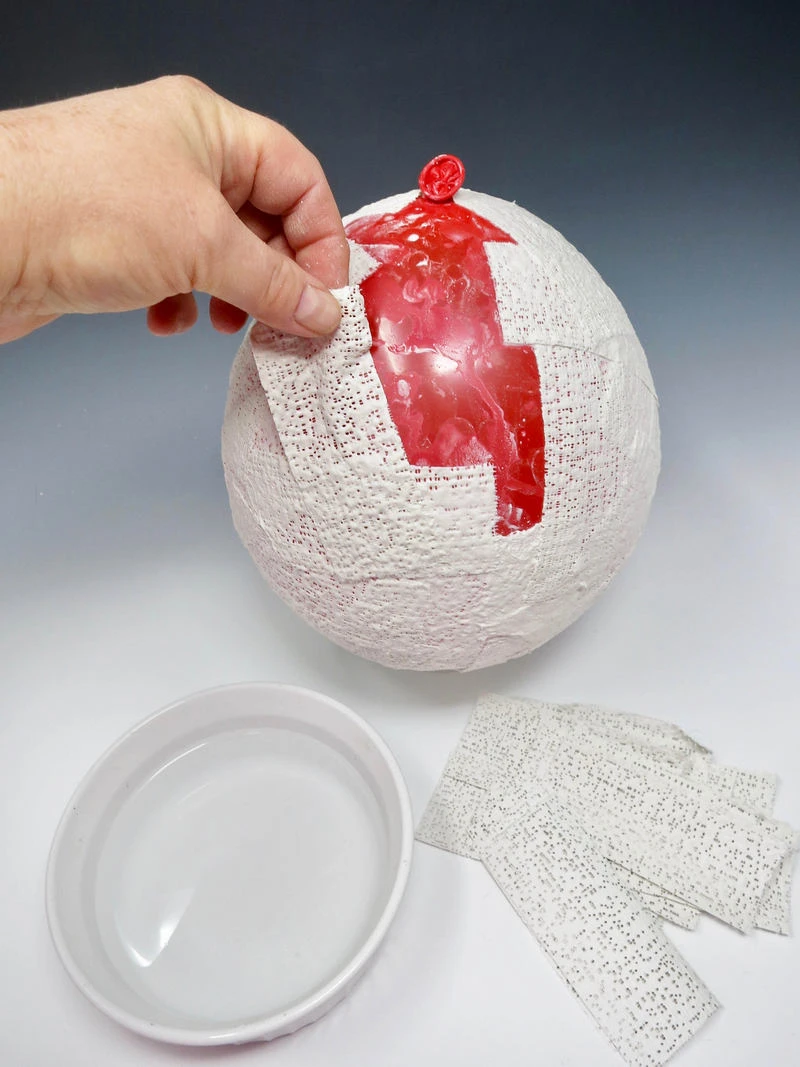
Rigid Wrap
Cut 1”- 2” strips of the Rigid Wrap. Dip each strip into warm water and layer each one on top of the balloon. Gently smooth the plaster on the strips with finger tips. Allow the first coat to dry completely before applying additional coats. Apply several coats as needed.
Step 3:
Smooth
Attach the cup onto the bottom of the Rigid Wrapped balloon using a hot glue gun. Cover the cup with Rigid Wrap. Add additional plaster where needed to achieve a smooth surface.
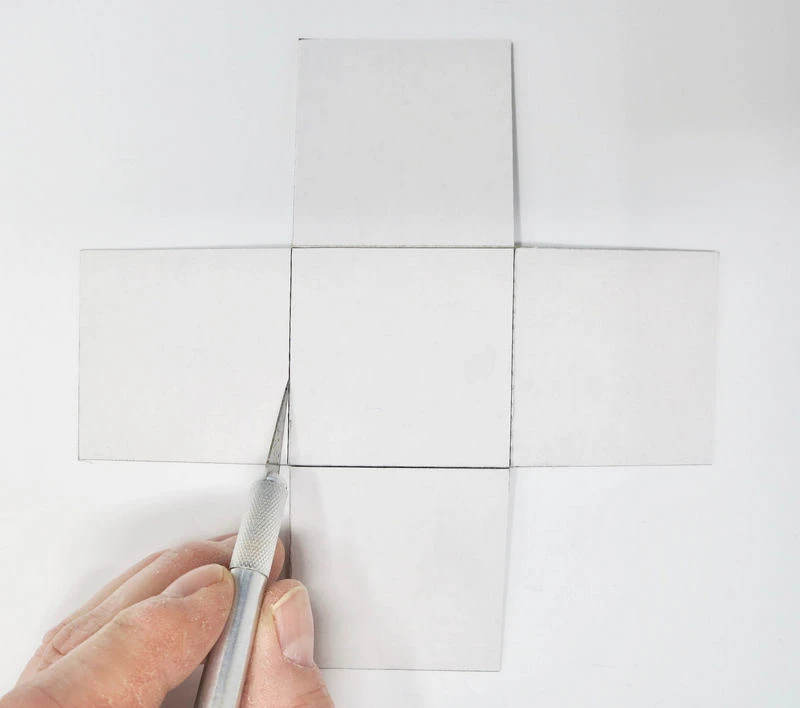
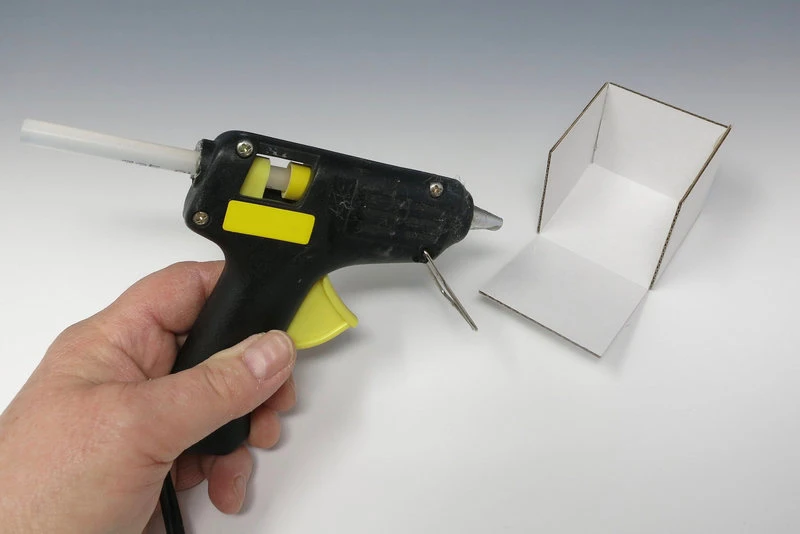
Step 4:
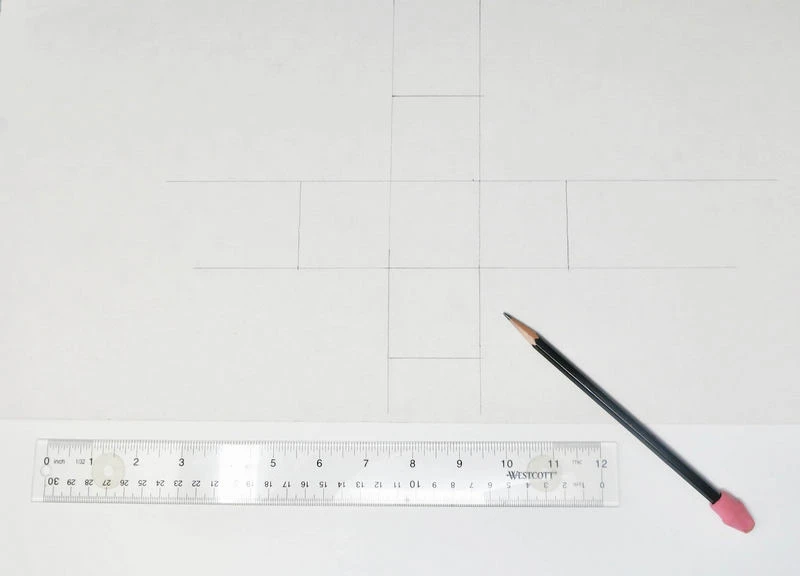
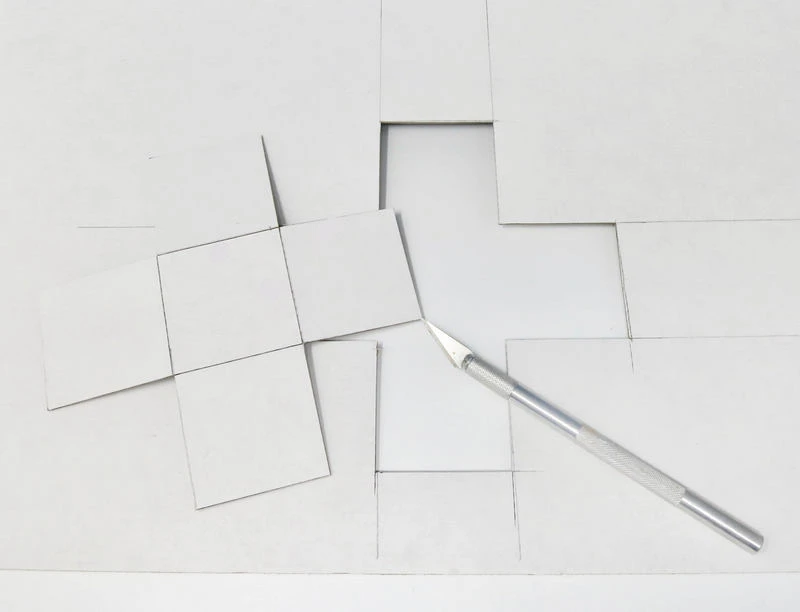
Cube
Measure out the dimensions desired for a small cube to be used as the balloon’s basket. Cut out the shape using a utility knife. Score the sides of the bottom square and fold the cardboard into the cube form. Secure the sides by gluing them in place.
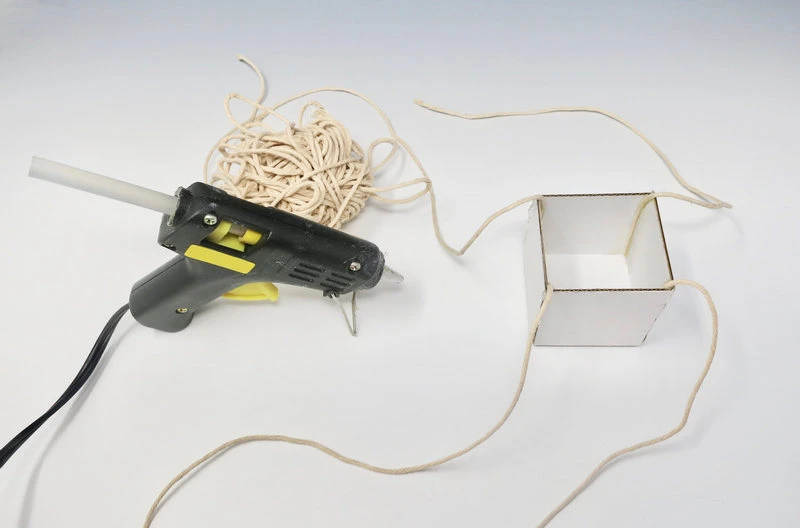
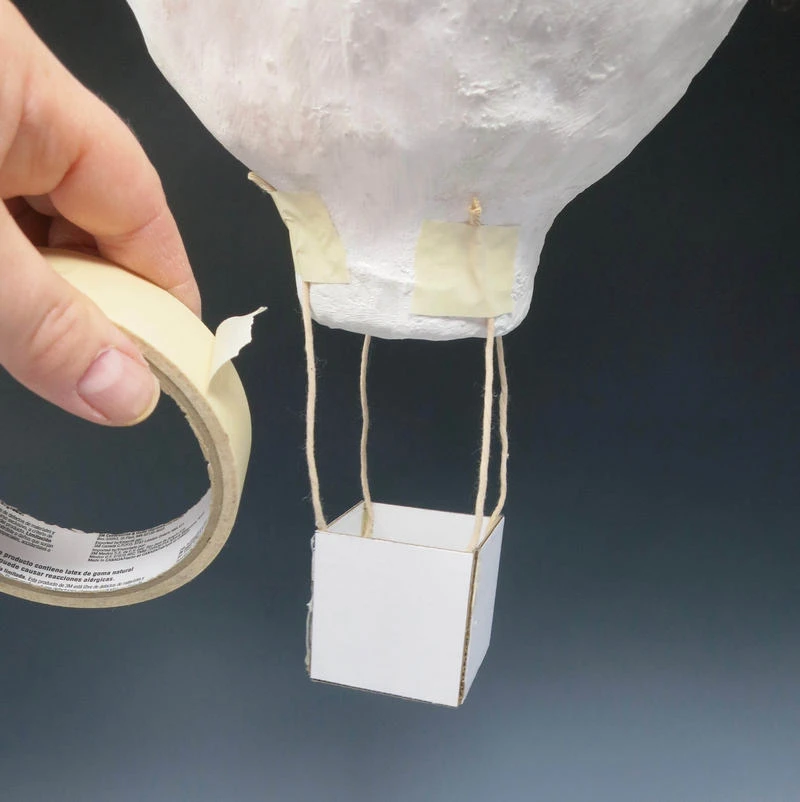
Step 5:
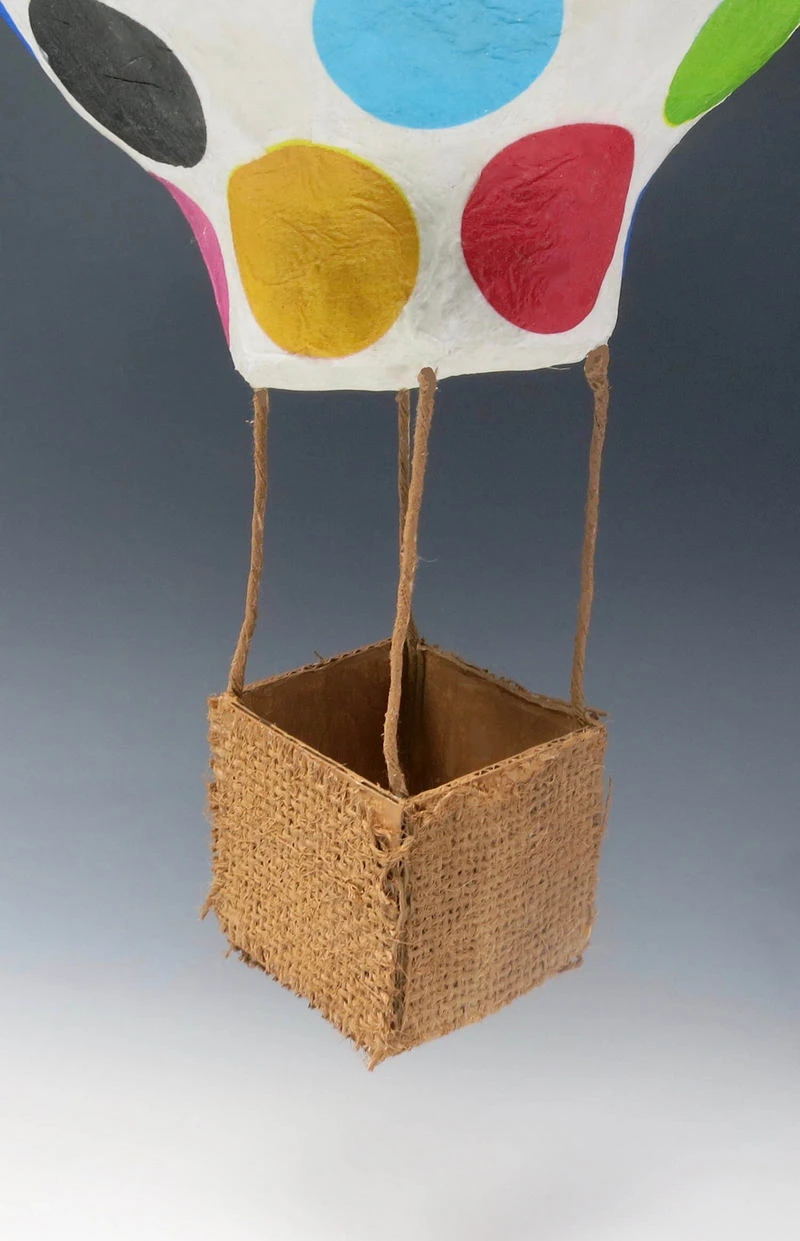
Ballon Ropes
Attach four strings to each corner of the cube. Then attach each string to the bottom of the balloon form using masking tape.
Step 6:
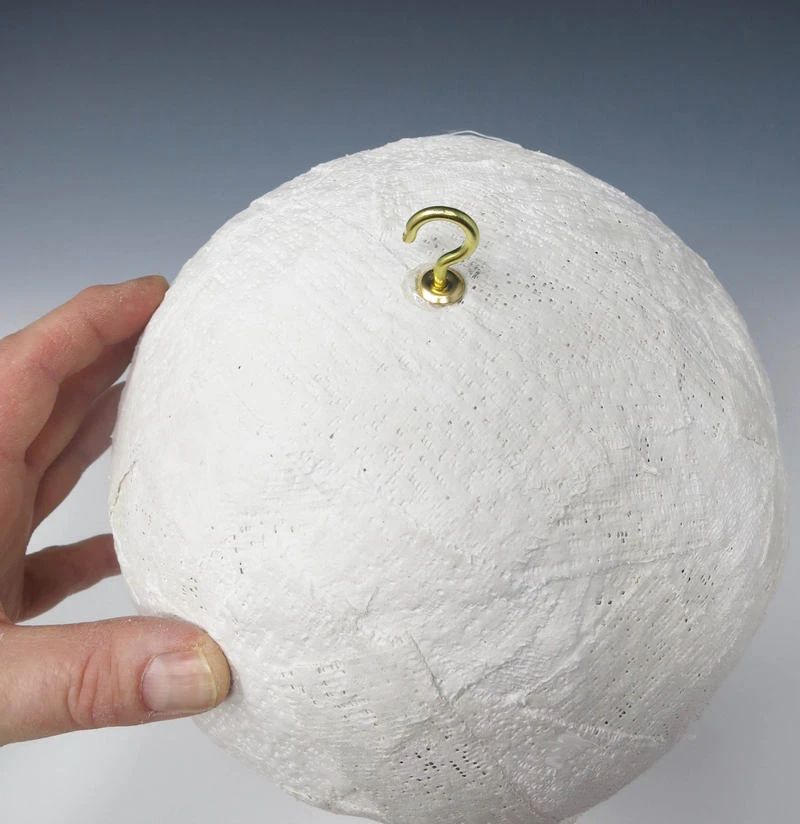
Hanging
Insert a C-Hook into the top of the balloon and secure in place with hot glue.
Step 7:
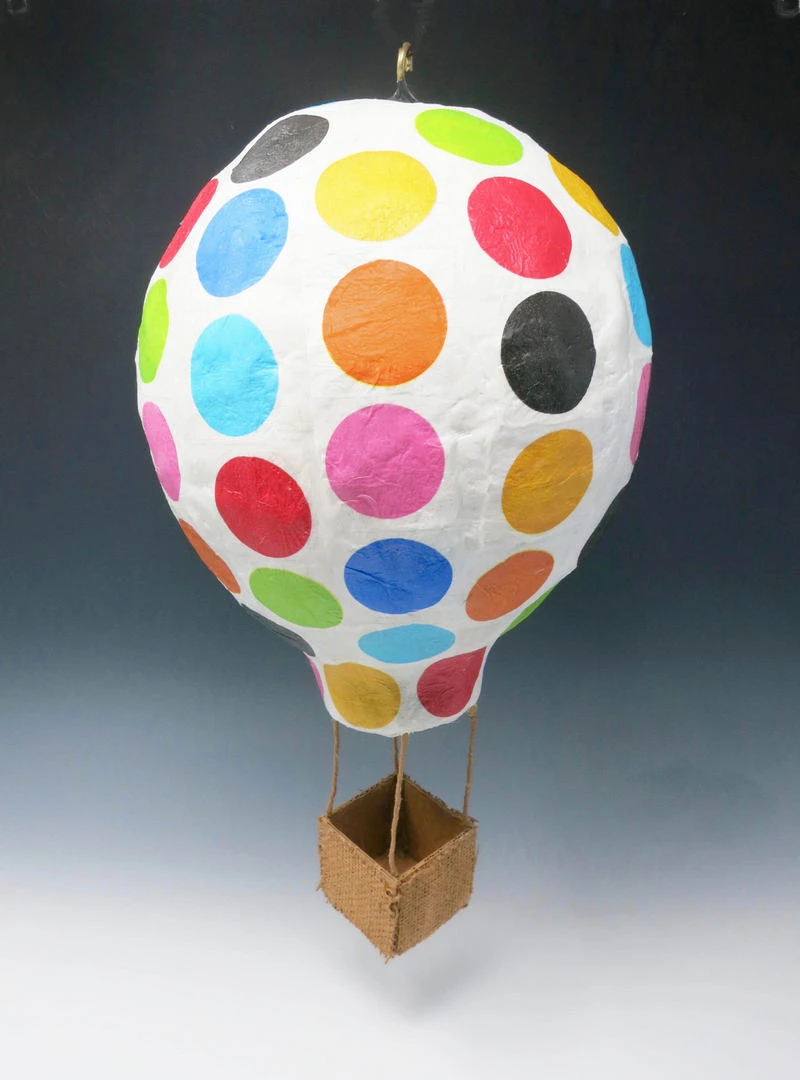
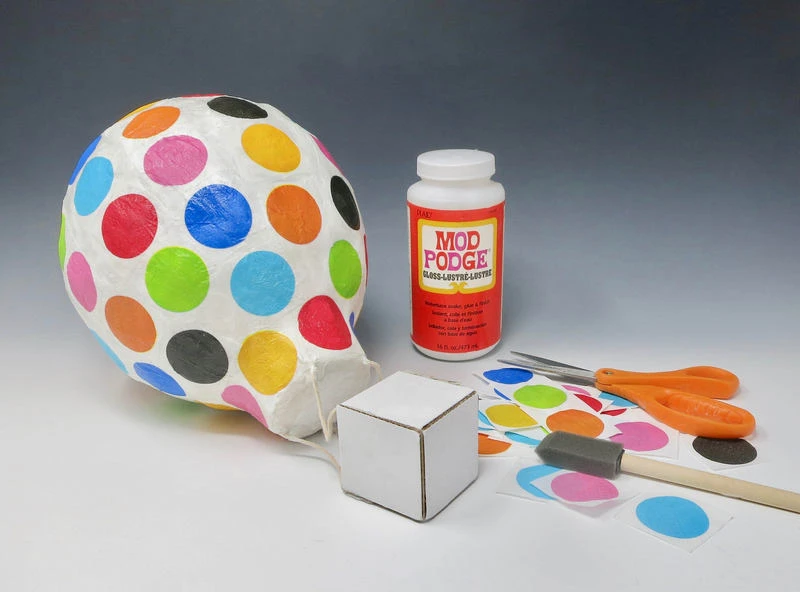
Balloon Design
Choose a design for the balloon. Designs may be drawn, painted or decoupaged onto the Riged Wrapped surface. Apply a gloss sealant like Mod Podge over the design when finished to give the ballon a shiny surface.
Step 8:
Basket
Apply burlap to the cardboard cube using liquid glue. Paint the burlap a natural fiber color to resemble a wicker basket.
Step 9:
Hang
Hang up the balloon and allow the sculpture to completely dry. Once dry it is ready to be displayed.