

Sand painting is a beautiful art form with deep roots in world history – from the
ancient Australian Aboriginal sand art, to the meditative and impermanent Tibetan
sand mandalas, to the more modern-day Native American ceremonial sand paintings.
Give it a try for yourself - work with a template, copy a tracing or doodle freehand.
With so many colors of Scenic Sand available, you can create whatever imagery you like!
• Scenic Sand – red, pink, white
• Aleene’s Clear Gel Tacky Glue
• Aleene’s Tacky Dots
• Two 8” clear acrylic squares (order online or from your local frame shop)
• Sticker sentiment
• Small stiff paint brush
• Wood skewer
• Silicon spreader (optional)
• Glitter tray
• Dark cardstock (optional)
• Paper trimmer
• Painter’s tape, scissors, damp paper towel
2. Tape the template behind one sheet of acrylic.

3. Squeeze a small amount of glue on top of the acrylic, along the lines of the template.
Spread flat and even with a silicone spreader or your fingertip, wipe away any excess with
the corner of a damp paper towel.
4. Snip a tiny corner off a package of sand and pour a little on top of the glue before it dries.
Tap off excess sand into a glitter tray for returning to the package later.
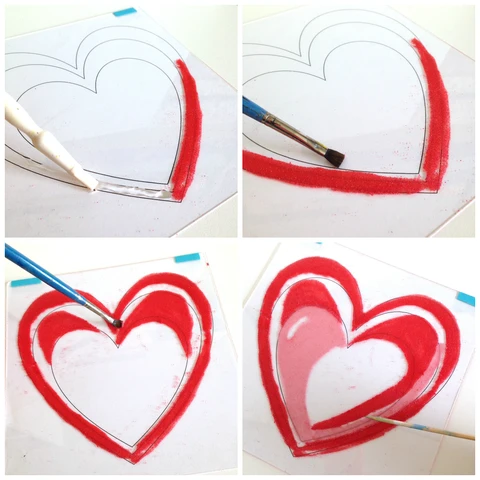
5. Use a stiff brush and/or skewer to shape and scrape the glue and sand as desired, wiping
away excess. I went for the rougher look of brush strokes to avoid having to make the edges
perfect.
6. Working in small sections, repeat steps 3-5 with different colors of sand to fill in all or most
of the heart as desired. Try doodling and spreading curved shapes with the glue.
7. You may find it easier to see what you’re doing by working on top of a white surface for the
darker colors of sand, and then switch to dark surface for the lighter colors of sand.
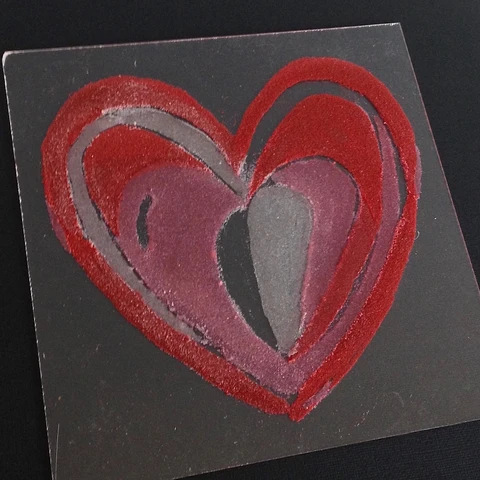
8. After the glue has completely dried and all stray bits of sand have been brushed or
blown away, apply a Tacky Dot in each corner, on top of the acrylic. Be sure to wipe
away any fingerprints, too.
9. Carefully place the second acrylic square on top, to sandwich in the sand painting,
allowing the Tacky Dots in each corner to secure the two squares together.
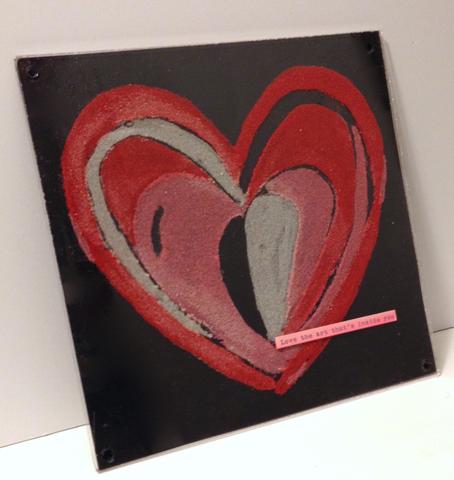
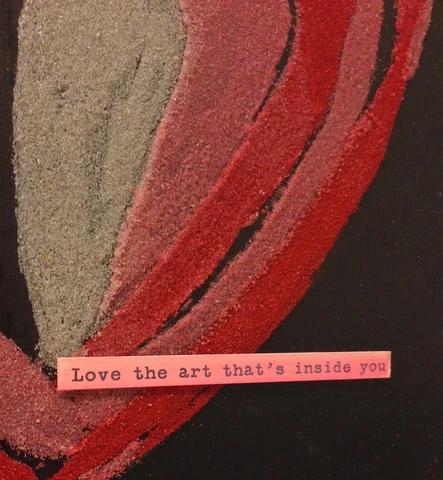
10. Adhere the sticker sentiment on the front.
• Place inside a square frame or use frame clips for “floating art.”
• Secure a sheet of cardstock on the back with 4 more Tacky Dots in the corners, then tape a ribbon loop or a hole-punched tag near the top.
• Seal the edges with decorative washi or duct tape if desired
 />
/>
 />
/>