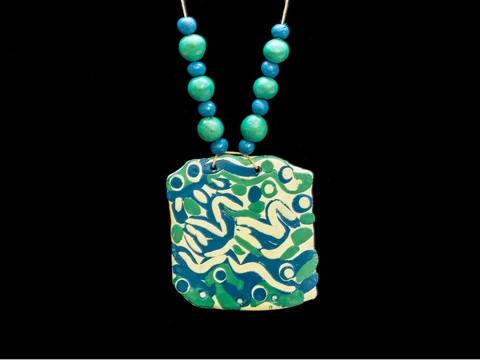
Create a one of a kind air dry clay necklace pendant with matching beads by
using Color Plus clay.
MATERIALS NEEDED:
Color Plus air dry clay in white, blue and green
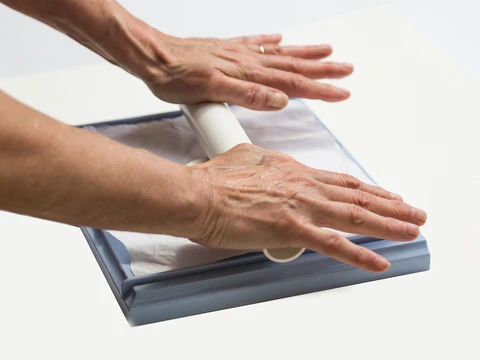
ACTÍVA Product’s Clay Roller kit
Cotton sheeting cut into 3 8” x 8” squares
Small cup of water
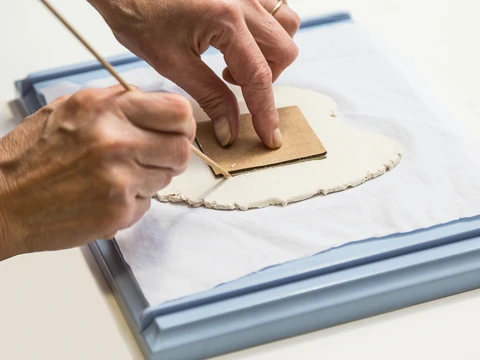
Wooden skewer
Piece of cardboard cut into a 2” x 2 ½” square
Toothpicks
Styrofoam block
Tan hemp cord 0.5mm x 3 ft.
Black permanent marker
Clear acrylic spray to seal
INSTRUCTIONS:
1. Begin by cutting off a piece of white clay the size of a large walnut. Knead the clay in your hands to soften it. If using the ACTÍVA Product’s Clay Roller kit, place a square of cotton sheeting on the base to be able to move your artwork freely. Use the slats that make the clay 3/16” thick and begin rolling the clay out with the rolling pin. When the clay is rolled out, use your wooden skewer to cut the 2” x 2 ½” square pattern for your pendant. With your finger, lightly wet the edges to smooth them out. Lightly wet the surface of your pendant so the colored clay will adhere properly. Set this aside. This is going to be your base to decorate. Think about what type of design you might like to make on the clay. I was envisioning two swans swimming when I made my design. You will need to go wash your hands and clean your tools every time you switch clay color. Tools need to be cleaned after each use.
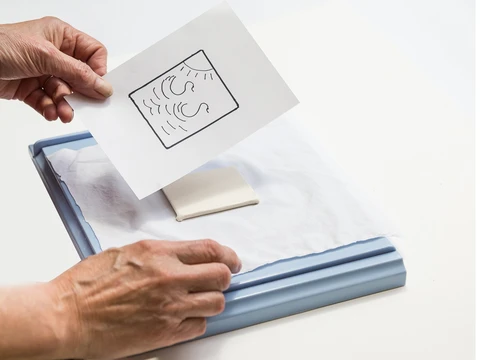
2. Roll out extremely thin coils like a toothpick and tiny balls of blue clay on a designated cloth. Use one color of clay at a time making sure to wash your hands to keep work clean. Place a clean sheet of paper on top of your pendant and roll the colored clay into the white base.
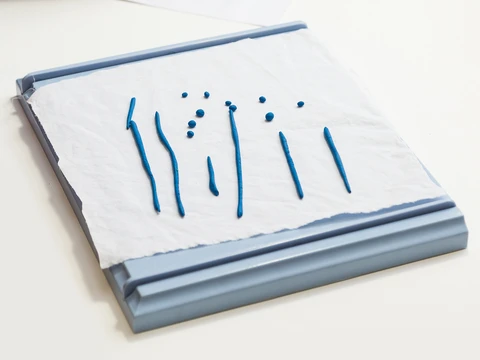
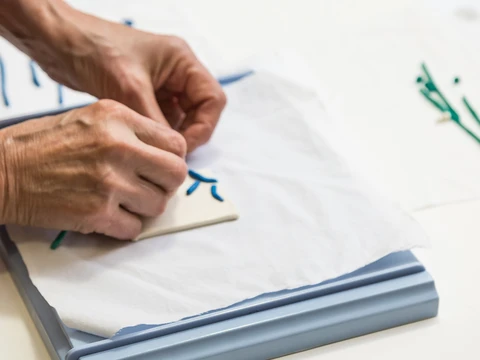
3. Make very thin coils and tiny balls of the green clay on a designated cloth. Place on your pendant with a sheet of paper and roll this in. You may notice the pendant is growing wider. You can cut it any size you want or leave as is. Experiment with layering colors or even mixing colors to make another shade of a color.
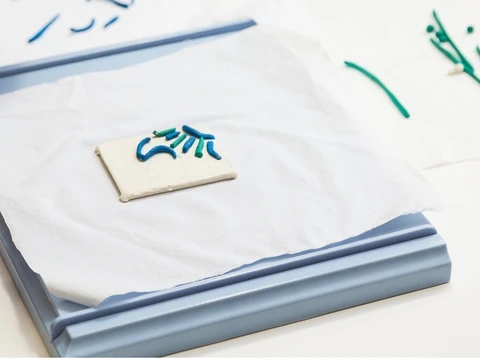
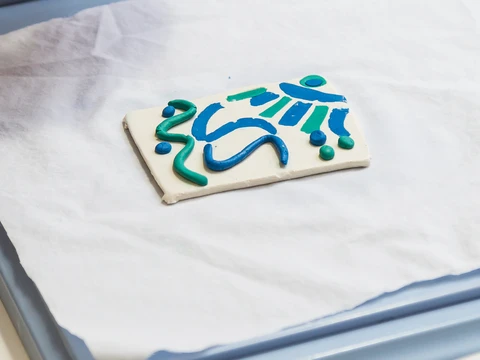
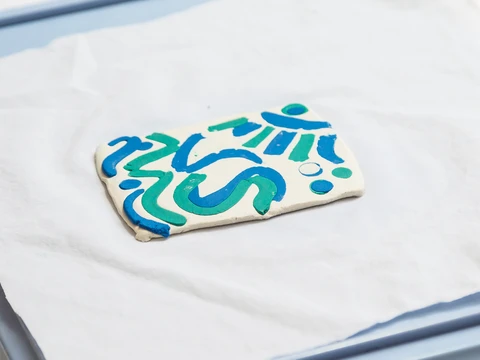
4. Use the wooden skewer to make two holes in the top of the pendant. Let this dry. If there are rough edges, an Emory board can be used to file it smooth. With permanent marker write your name on the back. Spray with clear acrylic paint to seal.
5. Optional beads can be made to enhance your necklace. Roll out 8 small balls the same size in blue. Use the toothpick to make a hole in each one. Roll out 6 larger balls in green and pierce each one with a toothpick. Let these dry.
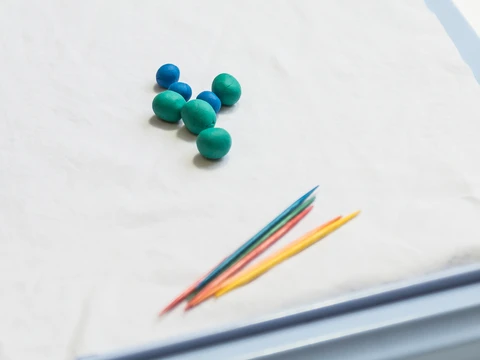
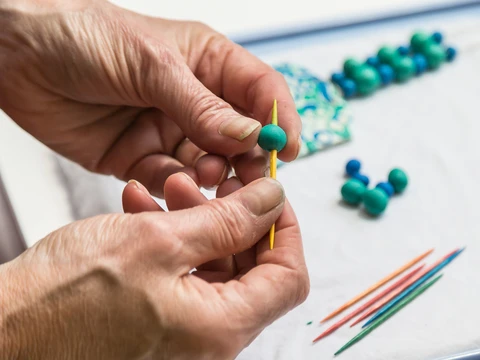
6. Place each dried bead on a toothpick and stick in a Styrofoam form. Spray with clear acrylic paint to seal the beads.
7. Assemble your necklace by using 0.5mm tan hemp. Leave enough cord that when you tie it in the back it can slip over your head. Enjoy your wearable art!
Artwork created by Karen Lowrey Photography by Don Auderer
