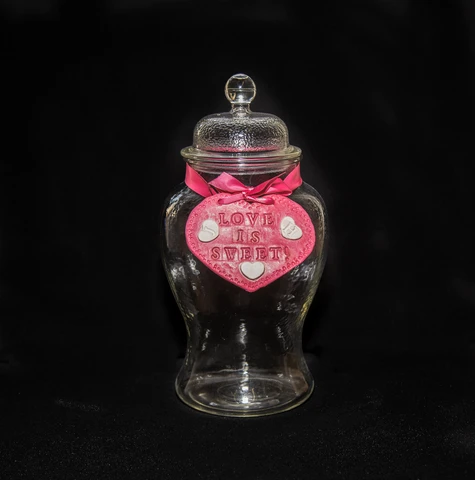
Candy bars are so much fun at weddings, birthday parties or just to say “I love you”.
Put a personalized message on each jar of candy for that special day!
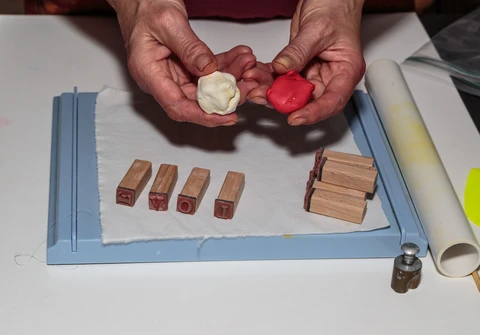
Materials needed:
Color Plus air dry clay in red and white
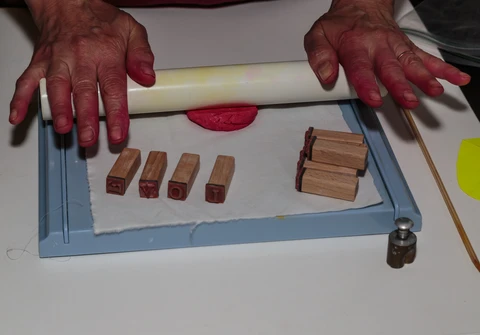
ACTÍVA Product’s Clay Roller kit
Cotton sheeting cut into 8” x 8” squares
A small cup of water
Wooden skewer or needle tool
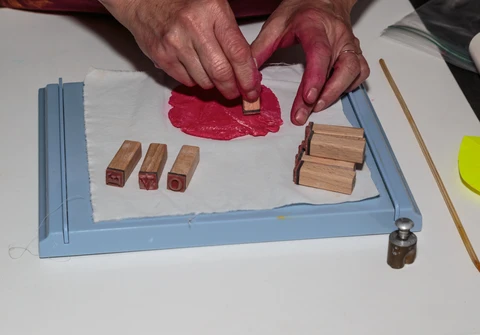
Alphabet stamp set
Heart pattern and small heart cookie cutter
Pink ribbon
Apothecary jar
Clear acrylic spray to seal
Instructions:
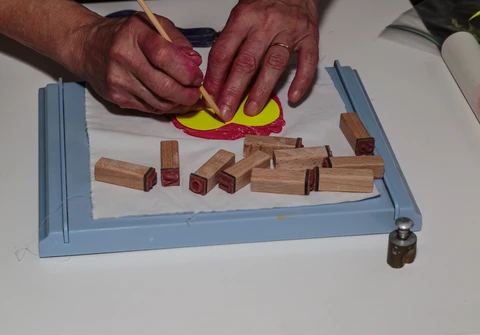
1. Cut off a piece of both the white and the red clay about the size of a large walnut. Take equal amounts of Color Plus white and red clay and begin to blend and knead the two together. Lightly mist the clay if you feel the clay is too dry and not pliable. When the clay is a consistent pink, then you can begin to roll the clay out with ACTÍVA Product’s clay rolling kit. Use a designated cotton sheet to roll your project out. Roll out to a 3/16” thick slab. Make sure to wash your hands and clean your equipment when you change color of clay.
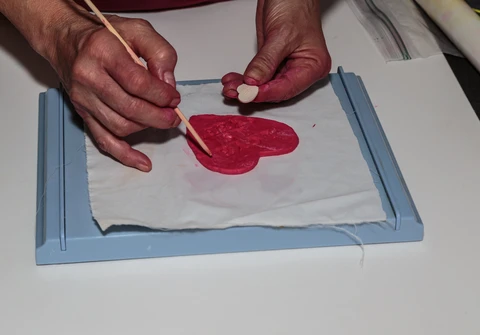
2. Using alphabet stamps press the sentiment into the clay. I stamped out “Love is Sweet”. You will need to carefully gauge how long each word is to have plenty of room. I cut the heart shaped pattern out after I pressed the letters to fit everything in to the space.
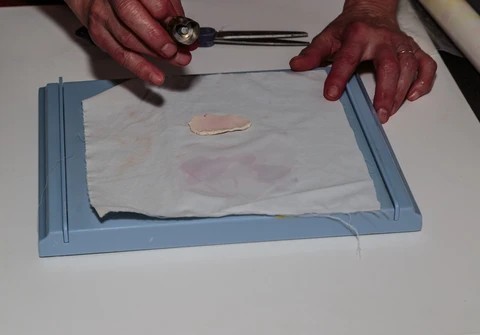
3. Break off a piece of white clay and roll it out on cotton sheeting. Roll out to 3/16” thick and then use a small cookie cutter to cut out three white hearts. Score or scratch with a wooden skewer on the back of both the hearts and where they will be placed. Moisten these areas lightly with water on your finger. Press these lightly to make sure they have adhered. I pressed the bride and grooms initials in two of the hearts. Using a dull pencil, make a design around the edge of the heart. Make sure to make two holes at the top of the heart to run a ribbon through later. If you see any rough or ragged edges take a little water on your finger and smooth these out.
4. Let dry completely. If there is a rough edge when dry, use an emery board to lightly sand it. Spray with clear acrylic spray to seal.
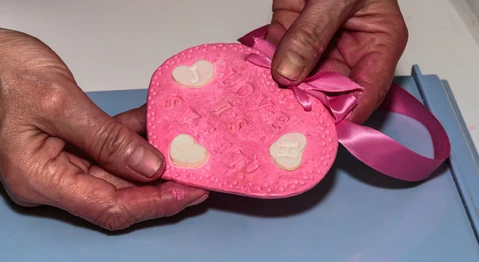
5. To assemble your project, measure the ribbon around the neck of the apothecary jar and leave the extra ribbon to tie a bow in front. Thread the ribbon ends through the holes. A toothpick may be needed to push the ribbon through. If your ribbon is fraying cut it off neatly and brush with clear nail polish to finish the edges of the ribbon. Fill your jar with candy and you are in for a “sweet” treat!
Artwork created by Karen Lowrey
Photography by Don Auderer
 />
/>  />
/>