Project by Michelle James of Our Crafty Mom.
Like so many of you, we love real flowers and hate throwing them out. The good news is that with our Flower Drying Art Silica Gel, you no longer have to! Let us show you how easy it is to dry real flowers and create a beautiful dried floral art project.
SUPPLIES NEEDED:
- ACTÍVA Flower Drying Art Silica Gel
- Plastic Containers with Lids (do not use with food afterwards)
- Fresh Flowers
- Scissors
- Canvas or Wood for Hanging
- Faux Antlers
- Hot Glue Gun
INSTRUCTIONS:
STEP ONE: It is best to start with flowers that are at their peak. I picked up two beautiful bunches of carnations at the grocery store. I loved the lilac color and knew these would be perfect for the project I had in mind. Be sure to remove any browning flowers before you start the drying process.

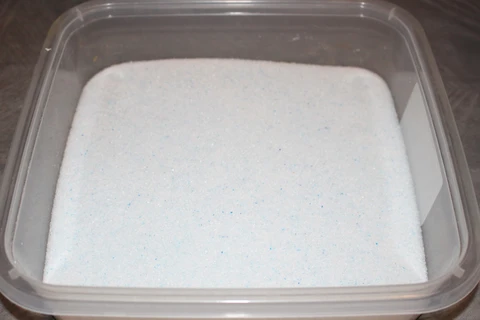
STEP TWO: Start by cutting your flowers right below the bud about an inch long. Fill your plastic container about halfway with the Flower Drying Art Silica Gel.
STEP THREE: Place the flowers standing upright in the container leaving space in between each flower.
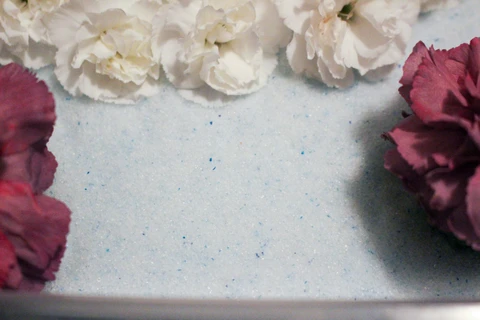
STEP FOUR: When you have all your flowers in the container be sure to completely fill it so the flowers are covered. For about 18 flowers I used one five pound box of Flower Drying Art and three containers.

STEP FIVE: Once your containers are full, place the lid on tightly and let it sit in a cool, dry area. Different types of flowers have different drying times, but the instructions tell you everything you need to know. For carnations it was recommended they sit about three days.
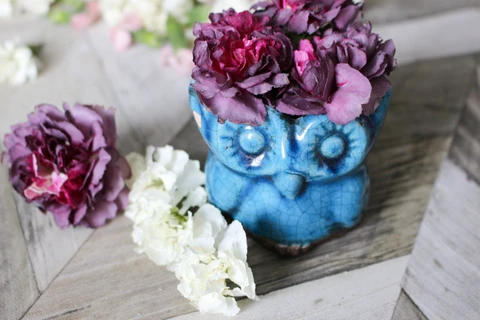
You see the blue crystals in the above picture? They will actually turn white when the flowers are dry. The gel sucks out all the moisture so your flowers will stay just as vibrant as they were when you put them in the gel! The most difficult part for me is patience! I waited three days, opened up the container and was thrilled to see these lovely flowers.
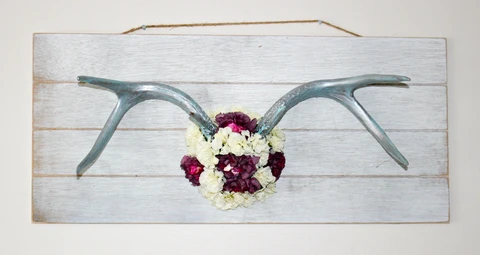
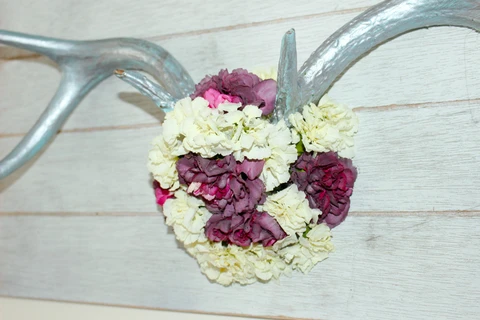
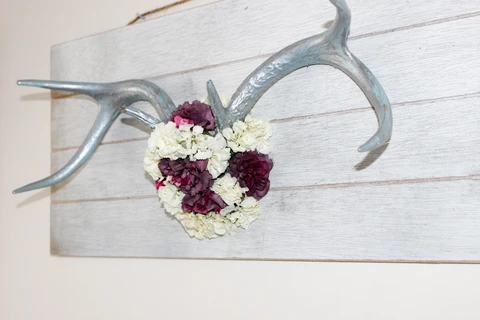
See wasn't that easy? There are so many things you can create, but I have been wanting to use these faux antlers I picked up at a home décor store a while back. I love the deer art you see everywhere and immediately thought of creating a dried floral wall art.
STEP SIX: Once the flowers were dried this took me under 30 minutes. Use the hot glue gun to center the antlers on the wood board applying the glue where it meets with the board. I did add quite a bit to ensure it was secure. Next start attaching the dried flowers using just a little bit of hot glue. I continued to fill it in until I was happy with the design. Here is a close up of the flowers:
Another thing I love is that you can reuse the Flower Drying Art Silica Gel. Just place it in a shallow pan in a heated oven at 250 degrees for at least 5 hours. You will start to see the blue crystals reactivate. Think of all of the beautiful dried flower projects you could make!
Please PIN and share this project and let us know what beautiful dried flower art you plan to create with Flower Drying Art from ACTÍVA!
 />
/>  />
/>