
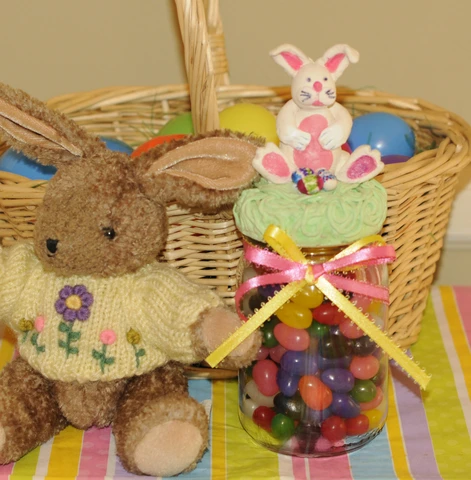
Fill this darling jar up with all sorts of colorful candy to give away this Easter.
An Easter bunny sits proudly in a nest of grass with miniature Easter eggs
made with air dry clay. What a fun way to celebrate Easter by sculpting your
very own bunny!!
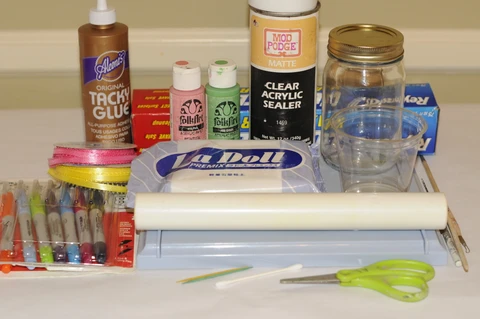
Materials needed:
LaDoll Premix air dry clay
ACTÍVA Product’s Clay Roller kit
Small cup of water
Wooden skewer or needle tool
Wax paper
Glass jar with tight fitting lid
Toothpicks
Scissors
Glue. I used Aleenes Tacky Glue
Permanent colored markers
Ribbon
Garlic press
Disposable gloves
Green and pink acrylic paint. I used Folk Art
Q-tips
Clear acrylic spray. I used Mod Podge
Plastic bag
Instructions:
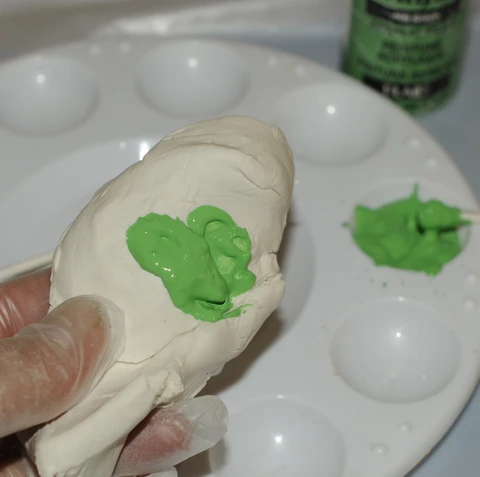
Place a piece of wax paper onto the clay roller kit. Begin by cutting a piece
of clay off of the block of La Doll clay about an inch thick. Place the unused
portion of clay in a plastic bag to keep it fresh. With gloves on, blend some
of the green acrylic paint into the clay by using the q-tip to apply. Knead the
clay to achieve even color and cut a small piece of this green clay off and set aside.
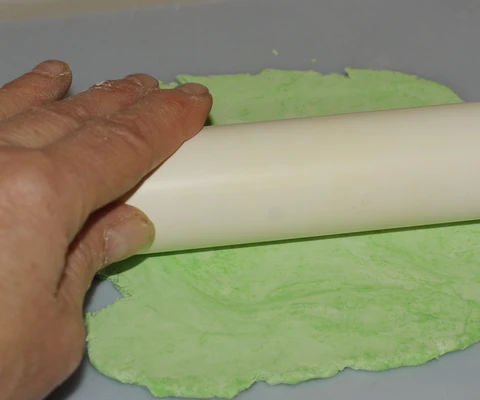
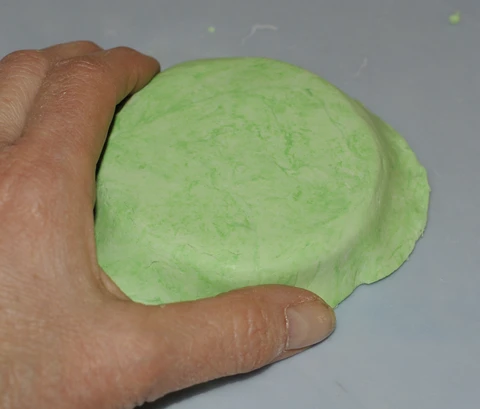
Roll the rest of the colored clay into a ball and then using the rolling pin flatten
out to a uniform width. I used the 1/8” side rails on the roller kit. You could use
wooden rulers or paint sticks also.
Cut around the lid with a needle tool leaving a little over a ½” margin depending
on the width of your lid.
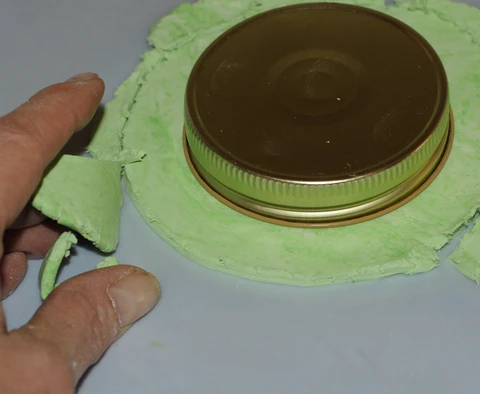
Smooth the circle of clay over the jar lid. If using a mason jar lid, glue the two
pieces together. Moisten your finger and smooth out any cracks.
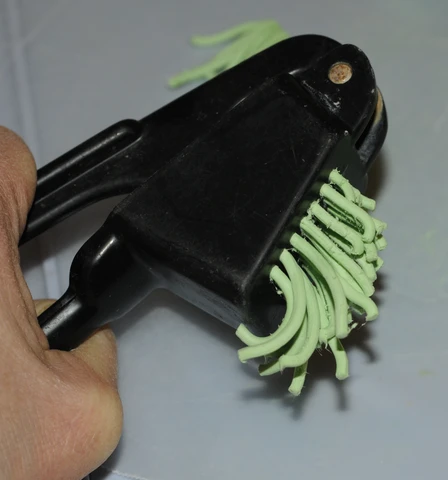
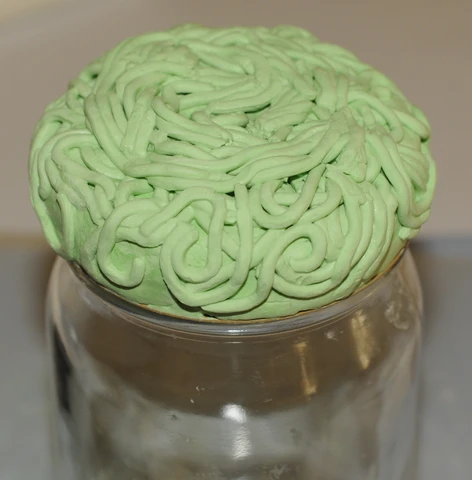
Using the garlic press, press the piece of green clay that you set aside into
strands of clay. Moisten the strands slightly, and begin placing these onto the
lid top. This is going to be the bunny’s nest.
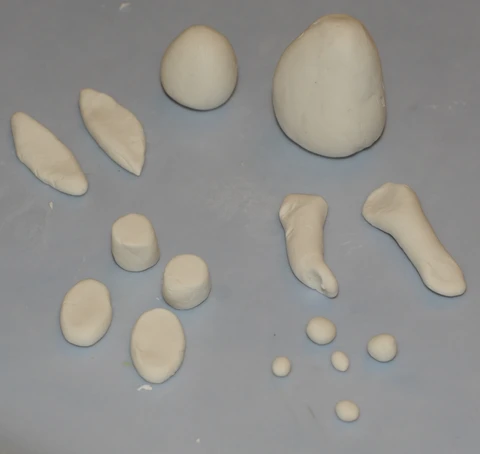
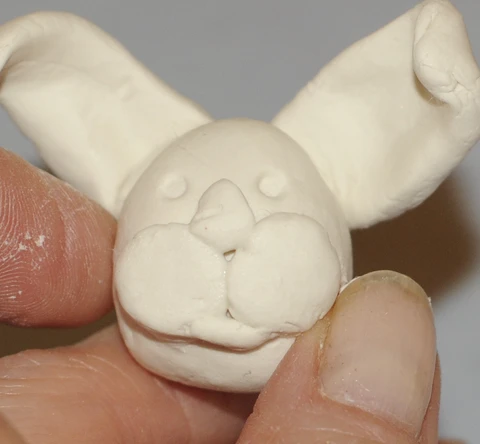
Set this aside and begin sculpting the bunny. Using the white clay, make two
egg shapes with one of the shapes being 1 ½” tall and wide and the smaller
being ½’ tall and wide. Roll out two small beads and press into flat circles for
the bunny’s cheeks. Pinch a small triangle for the nose, a tiny coil for the lip
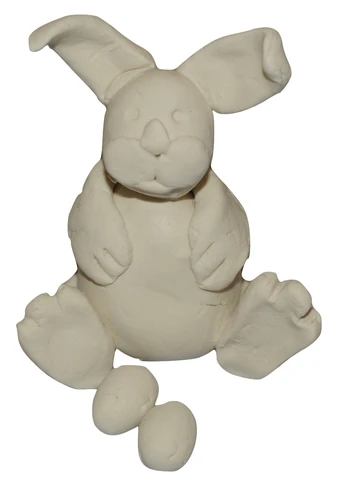
and two long tear shapes for the ears. To make arms, roll out two coils and to
make feet, roll out two small cylinders and two tear drops. Make sure to roll out
several very small ovals to look like miniature Easter eggs.
Assemble the bunny’s face first. Moisten each piece so they will stick firmly
to each other.
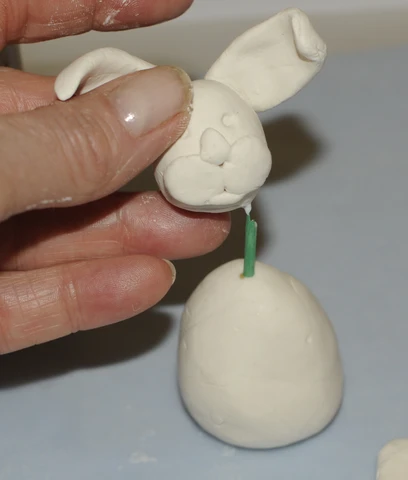
Take a toothpick and break it in half and push it into the body at the narrow end.
I used glue to make sure the head would stick to the body.
Moisten the arms and press onto each side of the rabbit. With a skewer mark
the paws. Now, make the feet by pressing the two short cylinders to the body of
the rabbit. Moisten the legs and put the feet on the rabbit. Use a sculpting tool or
skewer to form toes.
Let this dry completely and then paint the inside of the ears, tummy, nose
and bottom of the feet pale pink. Use the black marker to draw in whiskers
and eyes. When this is dry, glue the bunny onto the jar lid on the green grass.
With brightly colored permanent markers, draw on the small Easter eggs.
Glue these to the jar lid as shown. Let dry. Spray with clear acrylic paint to
seal the clay. Wrap two pieces of ribbon around the neck of the jar and tie
into a bow. Fill the jar with brightly colored jelly beans!! Hooray for you!!
You are ready for the Easter bunny!!!
Artwork and photography by Karen Lowrey
 />
/>  />
/>